Checking your blood sugar is a crucial part of diabetes care. Learning how to understand your body’s messages and why your blood sugar behaves the way it does will be valuable knowledge when adjusting your management. By checking your blood sugar regularly, you can gain an accurate picture of how your levels react to certain things and learn how to better regulate your sugar.
Checking your blood sugar shouldn’t be overwhelming. In fact, many should incorporate checking levels into their daily routine. Levels should be checked regularly and at specific times, in order to understand what affects your blood sugar and provide the information needed. Diabetes can seem unpredictable, but through careful tracking you might start to notice patterns.
If you’re looking for more information about testing, or are new to diabetes care, check out Diathrive’s learning center for helpful tips! The first step in diabetes care is learning how to check blood sugar, so here’s how.
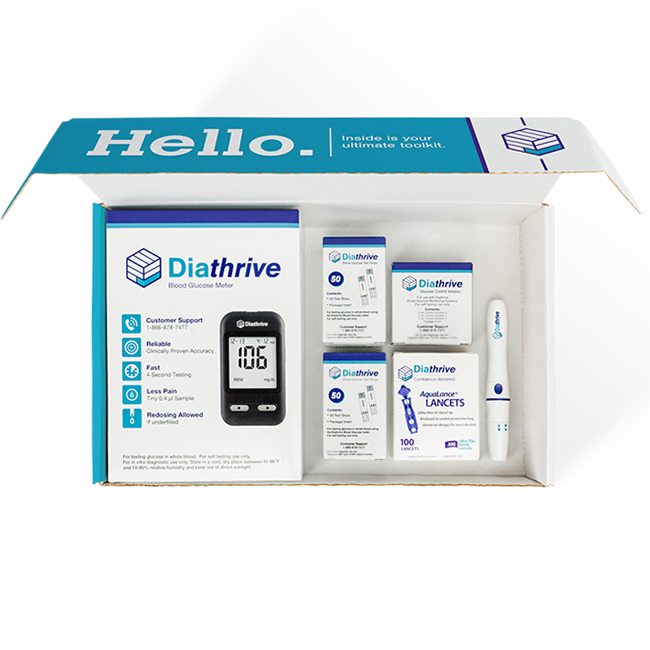
Tools and Supplies Needed to Check Blood Sugar
There are a few different supplies needed to safely and accurately test blood sugar.
-
A blood glucose meter is a device that facilitates the testing of your drop of blood and provides the blood sugar reading. There is a port on every meter where a test strip is inserted, and a screen that displays the reading.
-
Glucose test strips have a capillary that draws your blood sample in where it mixes with a glucose oxidase enzyme on an electrode. The glucose meter then sends an electrical charge through and measures the resistance and gives a result proportional to the amount of glucose in the blood sample . When inserting the test strip into the meter, make sure you’re following the directions to insert it in the right way.
-
A lancet is a small needle that pricks the skin, allowing you to draw a blood sample. They are put into a lancing device and. Sanitary lancets are essential in ensuring that each testing experience is safe and reducing all possible infection.
-
A lancing device holds the lancet that pricks the skin to draw a drop of blood. On one end of the device is where the needle is inserted and on the other end will be the depth control settings. When the device’s trigger button has been pressed, the spring in the lancing device will quickly, and usually painlessly, penetrate the skin just enough to draw the right amount of blood.
-
Alcohol pads should be used after your blood sugar test is complete to wipe the testing site, and can be used to wipe down testing equipment between tests to make sure your tools are clean and safe. Always wash your hands thoroughly and dry completely before checking blood sugar to eliminate any substances or oils that could impact the glucose meter’s reading.
Your blood sugar testing kit probably came with control solution as well. This is not needed for actual testing, but rather for ensuring glucose meter accuracy. By checking your glucose meter with control solution, you can be sure that your results are reliable. Using control solution to check the first test strip in every new bottle of strips will provide you with the peace of mind that comes from knowing you can trust your supplies to be accurate!
Checking Blood Sugar in 7 Simple Steps
When it’s time to test your blood sugar, it can be done in a few easy steps.
1. Wash and dry your hands.
This step is important in avoiding infection and ensuring accuracy. Remember that all biological factors, including blood, should be handled with care and disposed of properly. It’s important to maintain proper hygiene when testing your blood sugar levels so that those around you aren’t put at risk and any blood borne pathogens are kept at bay. Additionally, washing your hands before drawing blood reduces the chance of contamination that can result in less-accurate blood sugar results. That includes water, so be sure to dry your hands completely.
2. Prepare the lancet.
When taking the lancet out of its packaging, make sure that the metal is not bent. Using a lancet that is bent will be very painful and damage your skin. Only ever use a lancet you’re sure is sanitary and safe. Lancets are single-use. Do not reuse a lancet. If you are a Diathrive customer, we will provide you with all the lancets you need at no additional cost.
3. Insert a test strip into your meter.
Insert a test strip into the designated port, ensuring it’s inserted as directed. Diathrive glucose meters will then display a blood drop and test strip icon signaling it is ready for the next step. Make sure to wait for this signal to appear, as applying blood too soon will result on a wasted test strip.
4. Use the lancing device to puncture your skin.
With a clean, new lancet in place, set the depth on the lancing device and pull back the end of the device until you hear it click. Then press the trigger button on the lancing device to prick the side of your fingertip.
5. Draw a blood sample and apply it to the tip of the test strip.
As soon as there’s a drop of blood, touch it to the strip so that it’s absorbed. Be sure to apply the blood to the top edge of the strip, not on top of it.
If you’re not getting enough blood for a reading, you may need to gently push on the surrounding area to encourage blood flow. While you don’t need a lot of blood, the drop should be big enough that it easily goes onto the test strip.
If you’re finding that you’re still not getting enough blood after trying to stimulate the area, there may be several things to consider. You should always use a sharp lancet, as dull ones can cause problems and may not be penetrating far enough. It can also help to hold your arms downwards, to encourage blood flow and increase your chances of getting a big enough drop.
If you’re consistently not getting enough blood, consider adjusting your lancing device for a deeper setting.
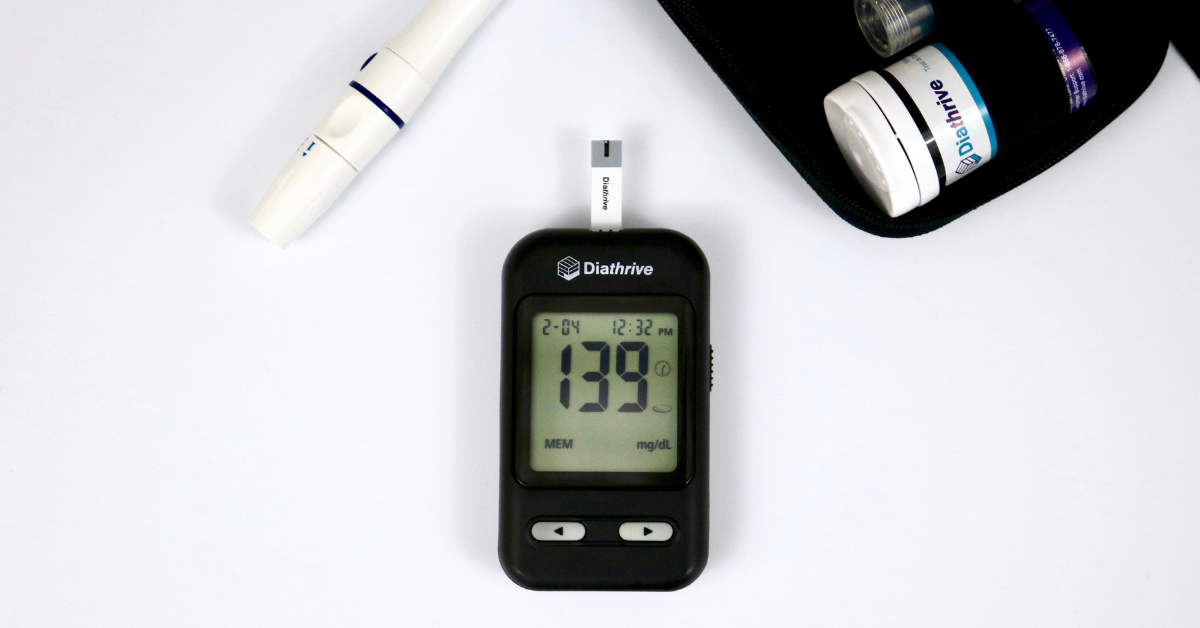
6. Wait for a reading.
Diathrive’s meter only takes 4 seconds to give you a result which will be displayed, large and easy to read, on the meter screen. It’s important to keep track of your results in a logbook, app or online database. Some glucose monitors have built in memory and can provide valuable statistics about your blood sugar level trends.
Always make sure to record your readings. Keeping a record of your blood sugar levels will help you with future blood sugar management decisions. Being able to show your doctors your blood glucose levels history will be an essential part of keeping them updated.
7. Clean the puncture site with an alcohol pad.
Always make sure that the puncture site is clean, both before and after. Pathogens can be spread through the blood, so all blood should be contained and any hazardous materials disposed of properly.
If you need some visual guidance, check out our video to walk you through the process:
Normal Blood Sugar Ranges
It’s recommended that fasting blood sugar levels be between 80 mg/dL to 130 mg/dL as often as possible for people with diabetes. Postprandial blood sugar, which is taken two hours after a meal, should be less than 180 mg/dL. Understanding these levels can be important when interpreting your own readings. However, it’s very important to note that you shouldn’t compare your levels to others and every single person has a different diabetes journey.
Factors That Can Affect Blood Sugar Readings
There are a few things that should be avoided because they can affect blood sugar readings.
If there isn’t enough blood in the sample, the meter may not be able to accurately read the glucose content. If you’re not getting enough blood from a lancet prick, tilt your arm down and allow gravity to do the work for you. When more blood enters the fingertip, the drop will most likely become a testable amount.
Expired test strips should never be used. The enzyme used is not guaranteed to be reliable past the expiration date, so the reading it will provide may not always be trusted. Using expired test strips is not worth the risk and there are cost effective options available. Using expired test strips can greatly impact the accuracy of a reading and simply should not be done.
Making sure that the testing site is clean is incredibly important in getting an accurate reading. You should always wash your hands with soap and water prior to testing. If there is oil or another substance on your skin that contaminates the blood drop, it could be read inaccurately by the meter. It’s also important to follow proper sanitary procedures in order to reduce risk of infection and make sure every testing experience is as safe as possible.
Taking Action Based on Your Reading
One of the most important steps of taking a blood sugar reading is remembering to record the results. By keeping a log of past data, you can learn more about how your body reacts to certain things and make more informed decisions in the future. There are some glucose meters, like Diathrive’s, that will store that information for you.
If you have low blood sugar, there are some products available which can help raise it. SOS glucose products have fast results and are proven to work. Keeping SOS packets or glucose gels with you can help in case of an emergency. If you test and realize your blood sugar is low, eat a candy or drink a sugary drink and then test again in 15 minutes. A low blood sugar level is considered to be 70 mg/dL or lower.
High blood sugar is considered to be a fasting blood sugar of 160-240 mg/dL; if a blood sugar reading is 300 mg/dL or over, treat it or seek medical attention. If your blood sugar level is high but not within the emergency range, there are some things you can do to lower it. Drinking water and taking insulin (if you’re an insulin user) will help lower blood sugar levels. Make sure that you keep a record that includes when your blood sugar is high, as that may be signaling the need for a medication adjustment. Food choices and stress can also raise blood sugar, but exercising may lower levels.
If your blood sugar reaches as low as 54 mg/dL or as high as 300 mg/dL, seek emergency medical help. With the guidance of a medical professional, you can make sure that dangerous blood glucose levels are being treated properly.
When seeing your doctor, bring a record of your blood sugar levels along so you can examine them together and see if any changes should be made to your diabetes management plan. Diathrive’s Glucose Meter has enough memory to store 300 tests and comes with a USB port for easy downloading to make record keeping easier than ever.
Being prepared for all situations is the best way to ensure all your diabetes needs are being met and you’re being proactive about your health.
Sources:
https://medlineplus.gov/ency/patientinstructions/000085.htm
https://www.medicalnewstoday.com/articles/317536#interpreting-the-results